Install CentOS 7 cukup mudah, CentOS yang merupakan singkatan dari Community
Enterprise Operating System adalah salah satu distribusi GNU/Linux yang berasal dari source
code Red Hat yang
dikembangkan oleh CentOS Project.
Enterprise Operating System adalah salah satu distribusi GNU/Linux yang berasal dari source
code Red Hat yang
dikembangkan oleh CentOS Project.
CentOS merupakan sistem operasi yang banyak digunakan sebagai server. Selain karena CentOS
berasal dari Red Hat juga karena dukungan dari komunitas yang baik. tapi juga dimungkinkan
sistem operasi ini digunakan sebagai desktop. CentOS menggunakan sistem manajemen
paket YUM (Yellowdog Updater Modified) sama seperti Red Hat ataupun Fedora.
berasal dari Red Hat juga karena dukungan dari komunitas yang baik. tapi juga dimungkinkan
sistem operasi ini digunakan sebagai desktop. CentOS menggunakan sistem manajemen
paket YUM (Yellowdog Updater Modified) sama seperti Red Hat ataupun Fedora.
Persiapan Install CentOS
Sebelum melakukan instalasi, anda menyiapakan beberapa hal yang dibutuhkan. Yang harus
dipersiapkan antara lain :
dipersiapkan antara lain :
- File ISO CentOS 7.
- VMWARE Workstation saya menggunakan VMWARE 11.
- Komputer atau Laptop.
Untuk mendapatkan file iso sistem operasi CentOS, kamu dapat mengunduh di halaman
web resmi CentOS Project. ada 3 pilihan yaitu DVD ISO, Everything ISO, dan Minimal ISO.
Untuk perbedaannya bisa dibaca disini. Penulis menggunakan tipe Everything ISO pada tutorial ini.
web resmi CentOS Project. ada 3 pilihan yaitu DVD ISO, Everything ISO, dan Minimal ISO.
Untuk perbedaannya bisa dibaca disini. Penulis menggunakan tipe Everything ISO pada tutorial ini.
Membuat Virtual Machine
1. Anda harus membuat sebuah virtual machine dengan cara klik File -> New Virtual Machine

2. Pilih Custom (advanced) selanjutnya klik Next >


- Installer Disc: instalasi OS nya lewat cd/dvd fisik
- Installer disc image file (iso): instalasi OS nya menggunakan file iso
- I will install the operating system later: untuk pemilihan kernel yang cocok dengan sistem operasi
4. Pemilihan Guest Operating System

- Guest Operating System : Linux
- Version : Other Linux 3.x kernel 64-bit. jika tidak ada pilih yang 2.6
5. Tahap ke-5 ini anda diharuskan untuk memberi nama untuk virtual machine + lokasi foldernya

6. Pemberian space HDD untuk Virtual Machine

- Maximum disk size (GB) : minimal nya 30GB
- Store Virtual disk as a single file
7. Customize Hardware

Klik Customize Hardware
8. Memberikan memory/RAM pada Virtual Machine

catatan : memberikan ram pada virtual harus dibawah max RAM fisik/aslinya. karena jika ram
yang diberikan melebihi RAM fisik maka yang akan terjadi adalah Not Responding
9. Insert Iso image CentOS 7
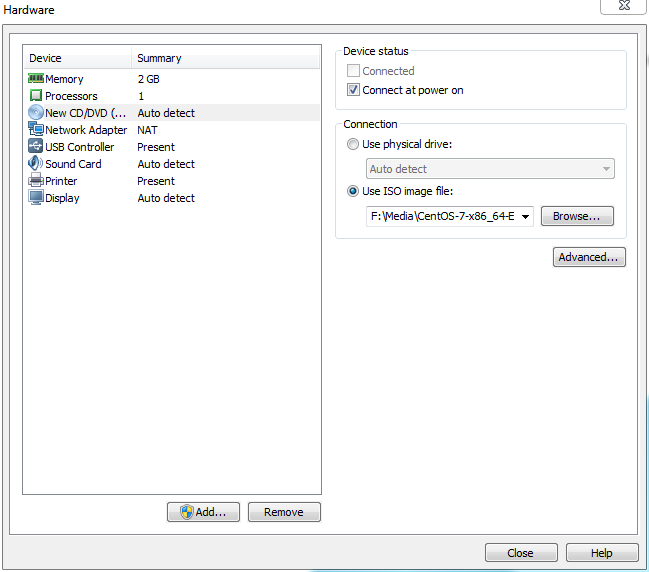
- Use physical drive: untuk instalasi OS lewat drive/DVD
- Use ISO image file: yang ini yang kita pilih. untuk instalasi OS lewat file ISO
10. setting interface network untuk virtual

- Bridge : virtual langsung terhubung ke LAN fisik
- NAT :
- Host only: memhubungkan antara komputer fisik ke virtual
- Lan segment: menghubungkan antara virtual 1 ke virtual lainnya
Jika sudah sesuai setting virtual nya silahkan klik Close jangan klik icon --> X
11. sekarang nyalakan virtual dengan men-klik Power on this virtual machine


Pembuatan Virtual untuk CentOS 7 telah selesai. untuk selanjutnya adalah Proses installasi
CentOS 7
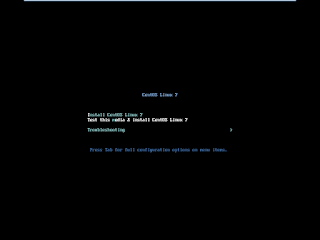
Installasi CentOS 7
1. Pilih Test this media & Install CentOS Linux 7


 Silahkan disesuaikan dengan kebutuhan anda
Selanjutnya klik Configure untuk konfigurasi IP nya
 catatan : 1. untuk konfigurasi IP Static <-- 1="" no="" pilih="" span="" yang="">
2. untuk konfigurasi IP Dynamic/DHCP Client


2. Tahap ini kalian diharuskan untuk memilih bahasa. saya sarankan pilih bahasa English.

3. Ada lumayan banyak menu pilihan di tahap kali ini untuk yang pertama silahkan kalian
klik Date & Time

4. Pemilihan Date & Time
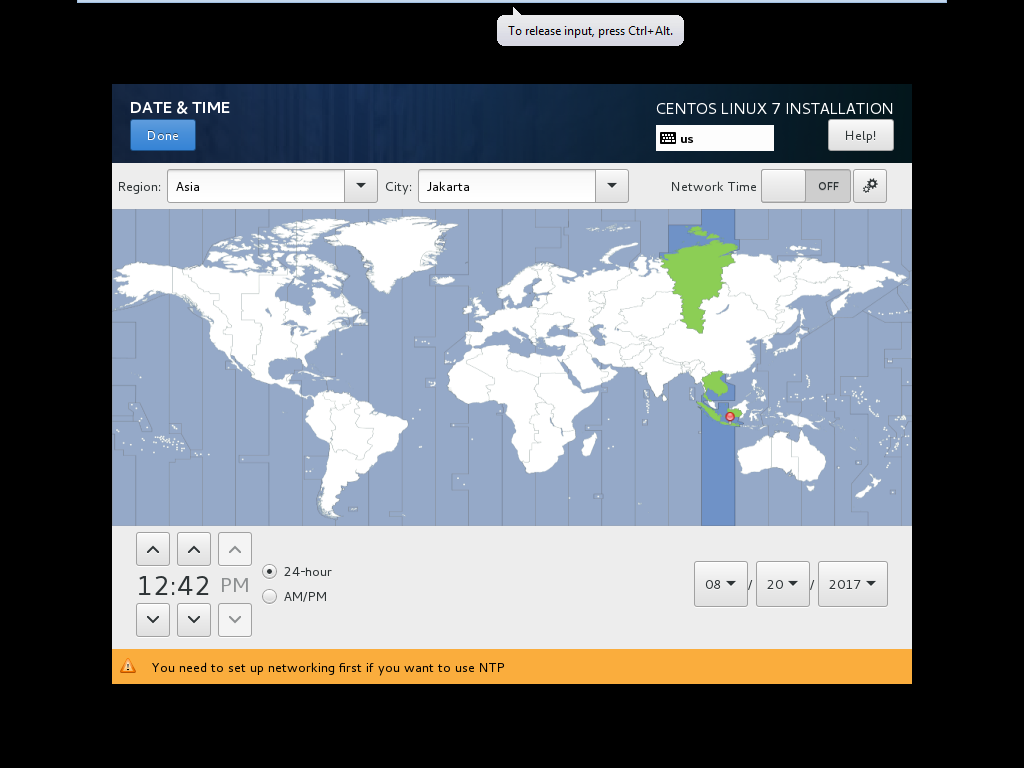
Pilih yang jakarta. setelah dipilih silahkan klik done
Selanjutnya pilih Software Selection
5. Software Selection

disini saya akan menggunakan lingkungan desktop Gnome. sesudah dipilih silahkan klik done
Selanjutnya pilih Installation Partition
6. Installation Partition

Klik kanan pada VMware, VMware Virtual/ 30GB, sesudah dipilih silahkan klik done
Selanjutnya pilih Network and Hostname
7. Network and Hostname

Selanjutnya klik Configure untuk konfigurasi IP nya

2. untuk konfigurasi IP Dynamic/DHCP Client

- Address : IP yang akan diberikan ke Server CentOS
- Netmask : Netmask nya
- Gateway : IP Router
- DNS Server : IP DNS yang diberikan oleh Router
Jika sudah sesuai silahkan klik done
Selanjutnya pilih Begin Install

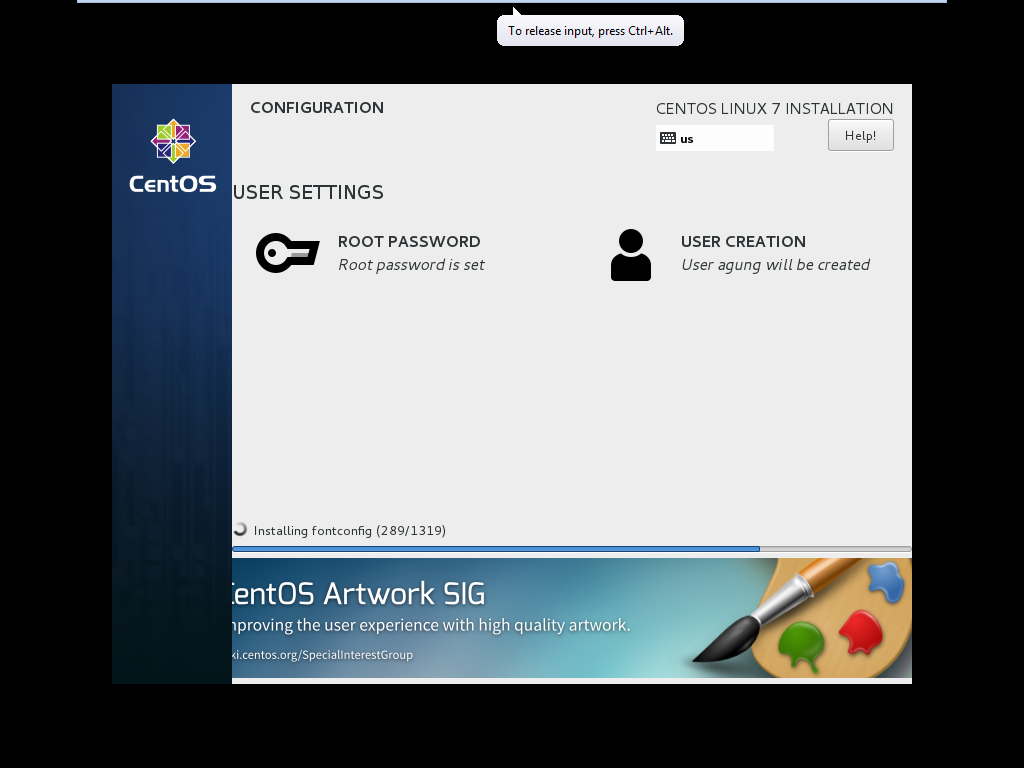
Disini kita diharukan untuk memberikan password root dan membuat user
yang pertama silahkan kalian pilih Root Password

Masukan Password yang cukup sulit. jika sudah silahkan kalian klik done.
dan sekarang silahkan klik lagi User Creation.
dan sekarang silahkan klik lagi User Creation.

Isi form diatas dan sesuaikan dengan kebutuhan anda. jika sudah silahkan klik done
Jika sudah sesuai maka akan tampil seperti dibawah ini
Setelah selesai instalasi silahkan klik REBOOT
Nah installasi sudah selesai. selanjutnya anda akan disuruh mengaccept lisensi CentOS Linux.
klik License Information.


Kasih ceklis di I Accept the license agreement. jika sudah klik Done. dan tekan Enter

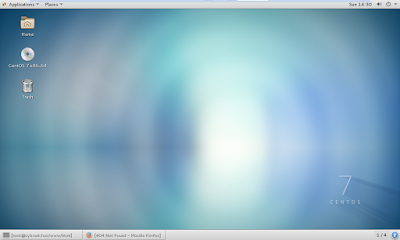
nah kurang lebih begini tampilan CentOS 7 menggunakan lingkungan desktop Gnome